Question 7:
What is the actionscript in flash to solve these following situations:
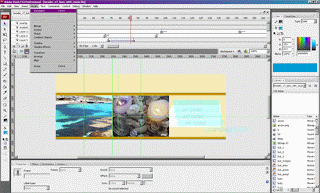
a. To link from one frame to another frame in the same scene in file
b. To link from one scene to another scene in the same file
c. To link one flash file with another flash file
d. To link flash file with any webpage


Answer:

a. To link from one frame to another frame in the same scene in file
On (release){
            gotoAndPlay( );
}
 -->put frame no or frame label in the bracket

b. To link from one scene to another scene in the same file

On (release){
            gotoAndPlay("Scene 2", 1);
}
-->put scene name in " " & frame no (for example 1 is frame no in scene 2)

c. To link one flash file with another flash file
on (release) {
loadMovieNum (“flash file name”, level number);

}
-->put file name in " " & level no
-->flash file must be .swf

d. To link flash file with any webpage

On (release){

            getURL("http://www.lescopaque.com ");
}
-->put the url of the website in bracket
DRAG N DROP APPLICATION

1. Open a file
2. Draw a tree by using pen/line tool
3. Name the layer as tree
4. Color the tree
5. Select the tree -->right click-->convert to symbol-->movie clip-->name it as tree
6. Insert a new layer-->name as fruit-->Draw a fruit by using shape tool-->color it
7. Select the fruit -->right click-->convert to symbol-->movie clip-->named it as fruit
8. Right click at tree shape-->chose action
9. Type action script code :

on (press) {

startDrag(this,true)

}

on(release){

stopDrag();

}

10. Close action window
11. Do step 8 for the fruit
12.Repeat step 6-7 to create another 4-5 fruits.
13. Repeat step 11 to insert action script to all fruits
14. ctrl+enter to test the movie
15. Save the file
click on the image to see the exercise

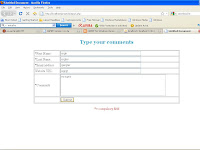
TEXT ENTRY QUESTION

Steps:

1. Open a new file
2. Draw a background
3. Type a topic question by using text tool-->choose as static text type
4. Named the layer as bg
5. Insert a  new layer-->named it as question
6. In this layer,use text tool-->type the question-->choose as static text type
7. Create a box  at the stage by using rectangle shape
8. Select text tool-->put the text above the box-->choose as input text type
9. Select text tool--->choose as dynamic text type (Below the box)
10. Insert new layer-->named it as button
11. In this layer,drag a play button from library panel to the stage-->resize as u want
12. Insert another new layer-->named it as stop
13. Right click at the first keyframe-->choose action-->Type this action script:

stop( );
var answer;
var respon;
answer = ""
respon = ""

14. Close action window
15. Select the button-->choose action-->Type this action script:

 on (release) { if (answer == "print client") {respon = "Your answer is correct!";

} else {

respon = "Sorry..Your answer "+ answer +" is wrong. Try again.";

}

}

on (release, keyPress "<Enter>") {

if (answer == "print client") {respon = "You're correct!";

} else {

respon = "Sorry..Your answer "+ answer +" is wrong. Try again.";

}

}

16. Close the window
17. In input text field,type answer for it variable
18. In dynamic text field,type respon for it variable
19. ctrl+enter to test the movie
20. Save the file
 
click on the image to see the exercise

APPS 4: mcq

10:39 AM | 0 Comments

APPS 4: TYPES OF INTERACTION

MULTIPLE CHOICE QUESTION

Steps:

1. Open a new file
2. Named layer 1 as question
3. Click text tool-->choose static text-->type the question
4. Insert new layer-->named as button
5. Create circle shape by using oval tool-->colored it-->resize it
6. Type A on top of the button
7. Select whole button-->modify-->convert to symbol-->named it-->choose button-->OK
8. Repeat step 5-7 to create button B, C and D
9. Arrange the button
10. Type the four answers.
11. Insert new layer-->named as respon
12. Put dynamic text-->type respon as variable
13. Insert another new layer-->named as action
14. Right click-->choose action-->type the action script:

stop();
var respon;
respon=""

15. Right click at the correct answer-->choose action-->type the action script:

 On (release){

            respon = "Congrates. Your answer is correct";

}

16. Close action window.
17. Right click at the wrong answer-->choose action-->type the action script:

on(release){

            respon = "Sorry. Your answer is incorrect";

}

18. Close action window.
19. Repeat step 17-18 for the next two button (wrong answer)
20. ctrl+enter to test the movie
21. Save the file
 
click on the image to see the exercise
::17052012::

APPS 4: TYPES OF INTERACTION


CREATING MAIN MENU

Steps:

1. Open a new file
2. Create 3 buttons: MAIN PAGE, UPIN & IPIN , WEB
3. In button layer, drag the three buttons into stage
4. Click at MAIN PAGE button--> go to properties-->type the instance name
5. Repeat the step to the UPIN & IPIN and WEB button
6. Go to Window-->other panel-->scene
7. at scene window-->click duplicate scene
8. Double click at scene copy 1-->rename it as scene 2
9. @scene 2, insert upin & ipin image
10. @scene 1, insert upin & ipin’s text banner
11. At button layer -->right click at 1st frame-->choose action-->Type stop();
12. Click at 15th frame-->Insert frame to all layers
13. Repeat step 12 to scene 2
14. @scene 2-->insert new layer-->named as upin
15. At properties panel-->named the frame label as upin
16. Insert new layer-->named it as stop-->right click at 1st frame-->choose action-->Type stop ();
17. @scene 1-->click at upin & ipin button-->choose action-->type command:

On (release){

            gotoAndPlay("Scene 2", 1);

}

18.close action window.

19.@scene 2-->click at main page button-->choose action-->type command:

on(release){

            gotoAndPlay("Scene 1", 1);

}

20. Close action window.
21. Test the movie
22. @scene 2-->Create a new button-->name as members
23. Click on frame 10-->press F6-->named as kawanupin on frame label
24. Insert a picture of upin & ipin members
25. Click members button-->type the instance name for this button
26.@scene 2-->click at members button--> choose action-->type command:

 on(release){

            gotoAndStop ("Scene 2", "kawanupin");

}

27.close action window.
28.test the movie
29.@scene 1-->click at about button-->choose action-->type command:

On (release){

            getURL("http://www.lescopaque.com ");

}

30. Close action window.
31. Copy the coding and paste to news button in scene 2.
32. Save the file

 
click on the image to see the output

Animated upin.....
Juz took previous upin n animated him....


Steps:
1.Open a file. (use previous upin drawn b4)
2.Insert keyframe at 5th.Adjust his mouth a little bit
3.Insert keyframe at 10th. Repeat step 2 and make the mouth smaller. At the same frame, adjust the eye. Just make the eye become 1 line.
4.Adjust his hand.
5. To make it smooth (xnampak ulang yg sama je), repeat the steps (copy paste the frame) and adjust the mouth/eye/hand(ikut creativity)
6.ctrl+enter to test the movie
7.Save file.


This week, we have many tasks:

1st Task : Create an animated bouncing ball

2nd Task : Shape tweening (text --> shape)

3rd Task : animation using motion guide (semut merah cari gula)

**************************************************************

Below are the step by step completing the task.

1st Task : Create an animated bouncing ball

The steps:

1. Open new file
2. Select shape tool n choose oval..
3. Draw a circle. you can draw a real ball n color it using paint bucket tool
4. Select the ball-->right click-->convert to symbol-->choose graphic-->named it as ball-->click OK
5.Click at frame 10,then right click-->insert keyframe/ press F6
6.At frame 10, change ball position
7.Then, at frame 20, right click-->insert keyframe/ press F6 n again change the ball position..
8. Repeat step 7 until frame 60 (its up 2 u).
*U can change the ball size n color
9.Select the layer-->right click at the frame area( all frame in this layer will be highlighted-->choose create motion tween
10.Press ctrl+enter to test the movie
11. Dont forget to save your file :)


2nd Task : Shape Tweening (transform from text to shape)

1.Open new file
2. Use text tool then type a text e.g i typed “diyana”
3. Break apart the text twice/ press ctrl+B
4. Right click at frame 20-->insert keyframe/ press F6
5.Right click at frame 60-->insert keyframe/ press F6
6. At frame 60, delete text then draw a star
**can choose insert blank keyframe, means at frame 60, it will be blank.
7. Between frame 20-60, choose tween="shape" at properties.
8.Press ctrl+enter to test the movie
9. Dont forget to save your file :)

3rd Task : animation using motion guide (semut merah cari gula)

1.Open new file
2.Draw a background of underground and named the layer as bg
3.Insert new layer--> named it as ant
4.Draw an ant using shape tool. Select the ant-->right click-->convert to symbol-->choose movie clip-->named it as semut-->click OK
5.Click at frame 60-->insert keyframe
6.Drag the ant to the new position.
7.Click layer ant-->click motion guide
8.Click pencil tool-->choose smooth
9. Draw 'laluan semut'
10. Click at the frame between frame 1 to 60-->Create Motion Tween
11.At properties-->tweening-->click orient to path
12. ctrl+enter to test the movie
13. Save the file


::10052012::

Apps 3: Creating Animation

We have 2 know from the basic:

1. types of symbol are-->graphic, button and movie clip

Graphic symbol= static images that are used mainly 2 create an animation..

Button = an interactive symbol that can detect mouse events. Button has 4 states: up,over, down n hit

Movie clip = consist of 1 or more graphic / button sysmbols, they hv flash movie inside ur flash project. Its not a static images. Can b animated using tweening tecchnique or using actionscript command

-------------------------------------------------------------------------------------------

2. types of animation are -->motion tweening, shape tweening, motion guide frame by frame

motion tweening = allow objects 2 b change 2 different position

shape tweening = can change the shape....meaning you draw a vector shape at one specific frame in the Timeline, and change that shape or draw another shape at another specific frame

motion guide = moving your symbol in a predefined path such as curves or circles. can refer 2 this link:
http://www.entheosweb.com/flash/motion_guide.asp
Home task -using onion skin...I'm struggling to complete this task because i have to attend 'kursus induksi' @ Mersing for 3 days ......here the outcome


For this task, i used line tool to draw the upin....n use paint bucket tool to color him :)
Happy to see my 'Upin' is ready nk g raya....betul betul betul heheh...
::03052012::

Today we've learnt bout drawing n coloring....

I can conclude that.....
To draw: Use Pencil tool,pen tool, line tool, brush tool
To color: Brush tool, Ink bottle, paint bucket tool n using eyedropper tool to pick sample color

For the class activity, I use line tool, brush tool to draw this pic n  paint bucket tool to color the object...plus i use some gradient technique to the iobject eg 4 the blue sky...

Here the outcome :)


 Some reminders/tips:
1. The line must be closed all together b4 u can color it
2. To draw 2 same objects, u can juz select 1st object, copy then paste it
     For example the birds n chairs
3.U can modify the brush size n brush shape
::26042012::

Salam all...

Today we have been exposed to Adobe Flash (formerly Macromedia Flash)  by using IPAD....hehe very excited ...(never have one huhu)..

Firstly, Dr Zaida's RO, Miss Nurul Farhana distributed to us  a pre test question about our basic knowledge of Flash...

example of adobe flash cs3

Some of the questions are; what is the using of text tool, what is diff between pen tool and brush tool, what are the applications can produce by Flash and s0 forth...

Using my seciput knowledge (after leaving the flash 4 years ago), i answered the Qs hehe.....

After that Miss Nurul distributed the IPADs to us..Even the IPADs are not enough n we have to share, I we still excited hehe...

Thru IPAD, we explore the Flash apps like the functions, application...Miss Nurul gave us 45 minutes to explore flash..Then she distributed a post test ques (same Qs)..and i think most of us managed to answer very well hehe

Anyway, this is an example of web banner:


Some useful links:
1. http://www.flashanimation.com/flash3content.html

some flash intros:
2. http://www.freenicetemplates.com/free-flash-animation/


Overall, FLASH are very interesting to learn...Lets learn!!
::19042012::

Today we've learnt how to create online questionaire..
we also learnt how to use radio button, checkbox, dropdown list....

Note: if the questions are 10, then it should have 12 fields (+id)

GOOD NEWS..........

1.The due date for assignment 1 is extend untill 11 May 2012 ,11.59..yeay
2. Next week we'll learn Flash using IPAD..double yeay :)

BAD NEWS.....
1. Today is the last day with Dr Zaida :(.. Next week we'll learn with Dr Jamal...
2. Flashhhh..................
::15042012::

We've set a discussion at Pusat Bandar Library , P.Gudang..We discuss about what system we're gonna create for Group Assignment.

We got the idea to create a system for online shopping. Then we discuss about the flow of this system, the database and a simple GUI..After that we divide tasks among us. For about 3hr,then the discussion finished..

Our system is  like this;

where
user -->can buy shoe thru online, register
admin 1 -->add,delete,update stock
admin 2--> delete, upadate registered user


::UPDATED::

Bad news.............

Dr Zaida said that our assignment should relate to education field...Huhu need to think other project...So sad huhu......Kak Diana & Linda chill ya :)
::05042012::

Salam all.....

Today we start class at 4.45 pm because Dr Zaida have a viva session with her PhD students.

Dr Zaidat shown us how to manage page for admin. We learnt how to add new record, view, update, delete and find record.

Its quit hard to follow Dr  because she's so fast I'm so slow hehe....

I managed to do the delete record, add record (same with register.php)..but the rest I hv to redo at home huhu....


click at name (blue one) to delete  record


 ::29032012::

For today class, Dr Zaida make a recall session..,
Dr show the steps that we've learnt last week...

After that we continue to new topic:create access level to admin.

Login Page

10:35 AM | 0 Comments

cont...............

Login

Purpose:
To secure our system.. Only recognized user can login to the system.
The user needs to register first before login.

Steps:

1. Create a table in db to hold all the data from the registration page.


2.Create register.php


3. Create login.php


4. Increase security by add Restrict Access to Page (input.php)


Tadaa....
....Register dulu ok baru login!!
Salam................
cont.......

This week we,ve learnt how to create input and view file.

Input= capture the input from user
View= view the input captured from user.
The steps:

1. Create input.php-->save
Input =must use InsertRecord


2.Create view.php-->save
View=RecordSet-->Bindings(drag je)


3.Repeat Region (to view all input inserted)
-dont forget the separator!!

4.Test!!
input file
view file

Some reminders:
1.not null=all field cannot be empty
2.If you face string error, refer to reserved word.
3. whenever user give input-->need a form

:)

9:40 AM | 0 Comments

Dr Zaida said we can submit the PHP file for the ASP task last week....Alhamdulillah
::22032012::

Salam everybody....May Allah bless us....

Today we've learnt about PHP.. So many steps today but I try to make it short summary :)

1. Stop IIS
2. On Apache


3.Go to XAMPP-->Security-->create password
-remember the password!!

4.Login phpMyAdmin

5.Create db--> create table


6.Create a site

7.Create connection

8.Start create PHP file!!!
I failed to do ASP homework in my laptop :(
Ada error huhu......................
I tried to do the task at class, but then the IIS got problem...Ask the abg lab also cannot solve the problem hmm....Lastly, Dr Zaidatun jgk the one who can solve the problem :)..
(Laaa rupenya itu je step dia huhu)

"Janganlah kamu bersikap lemah & jangan pula kamu bersedih hati. Padahal kamulah orang-orang yg paling tinggi darjatnya, jika kamu orang2 yg beriman." [Al-Imran : 139]
::15032012::

Salam all....today we've learnt how to create ASP file (first time using ASP yeah!!)....

Here are the steps:

1.Instal IIS (testing server)-already installed in the lab
2.create site (in DW)
click to enlarge
3.create db file (microsoft Access)
click to enlarge

click to enlarge

4.create the connection
5.create ASP file/setup the contact form
click to enlarge

6.insert first ASP behaviour (insertRecord)
click to enlarge

There are so many steps today..For those who are absent, get the notes n study ok :)
We have homework too.....:)

In this class, we also learnt about PHP vs ASP..Actually, I've been using php to develop a system, about 4 or 5 years ago .. But hehe forgot already...So I need to work hard to remember all these thing back...

PHP: PHP Hypertext Protocol
a) is a free technology you can download for many different Operating Systems
b) easy to pick up and learn
c) db:MySQL
d) testing server: apache server

ASP: Active Server Pages
a) need to buy additional tools to work with its programs
b) the language has a plethora of confusing programming patterns that will take a while to learn
c) db: m. access
d) testing server: Internet Information Services (IIS)

We can conclude that:


Read more:
http://www.aspvsphp.com/
http://www.pointafter.com/Archives/nl0203.htm
http://www.tizag.com/aspTutorial/aspVersusPHP.php
http://www.comentum.com/php-vs-asp.net-comparison.html
Defining a sites makes it
~ Easier to access, organize and manage
~ Avoid broken link
~ automation of logging into your web server and
~ Provides site wide features like search and replace
source: http://www.uoguelph.ca/isc/minutes/documents/managingwebsites.pdf

Below are the steps in managing a site

step 1: Name your site. eg: project. Just ignore the below part

step 2:  Choose the upper option


 step 3: Choose the recommended one


step 4:  Choose Local/Network

 step 5:  Choose None

step 6: A site named 'project' is ready!!


 step 7:  Copy your existing folder into this new site


 Finish..(",)


::08032012::

First of all, sorry to Dr Zaida for being late..I've meeting at SMK Taman Daya and only end at 4pm...

Do not like to come late because i'll miss a lot of information..please guys, dont be late ok!!
Dr Zaida have taught us about file management in web development. She explained to us that each subtopic should have its own folder with its own index,images folder etc. This is very important eg. for security purpose and it is easier to maintain the web for next time. See pic below.
click to enlarge
  
We also learnt how to make hyperlink a.k.a target. There are 4 types of hyperlink:
  1. from one html file to other html file
  2. from html file to other homepage
  3. in different location within a html file (eg:glossary)
  4. to email


some reminders:
a) use _blank target if you link your homepage to other people homepage.
b) use 1 word to name your file
c) Filename is CASE SENSITIVE

see you in next entries..daa..


Salam here i'll share what I've learnt in the lab today...

Dr Zaida have taught us an intro of DW. Basically, today we have learnt about inserting text,image, change bg color/ image, inserting table.

Here are the snapshots:
click pic to enlarge

1 more thing, you can copy your favourite design..Save the page and then open with DW..you can edit whatever you want ...i like hehe

ex: Faculty of Education Website
click pic to enlarge


p/s:
1. do not resize image in DW but do it in Photoshop
2.name the 1st page as index.htm/main.htm/default.htm
3.consistent in using whether htm OR html

About